Beanie Bars
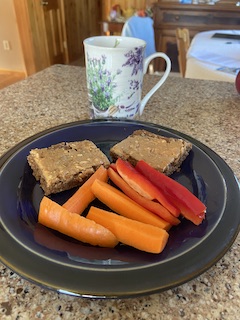
Tasty, Healthy, Easy, Cheap. These cinnamon snack bars have it all.
We eat a LOT of beans around here, so when I heard about bean based brownies I was, on one hand pretty interested and, on the other hand, pretty skeptical. There are some foods you just don’t mess with and brownies are probably really near the top of that list. True brownies all have that delectably moist, melt-in-your-mouth rich sweetness that brings their praise. Dessert just doesn’t have to be healthy. Dessert was given to be enjoyed in a balance of other goodness. So…Beans…. Really? I’ve tried several recipes and none of them are true brownies. I don’t want you to get your hopes up for a magical dessert that will have all the decadence of a brownie while being packed with protein and fiber and of course absent of sugar or calories. Let’s stay with reality here. My family suffered through a few trials so you don’t have to. These bars come mighty close to that magical bar and, dare I call it dessert? Yes!
We don’t even call these brownies but we all like them. My co-workers ask me to bring those bean bars in and the recipe is frequently requested. And they are CHEAP!
So what are they and how are they served?

TAKE BACK YOUR VITALITY!
Learn more about the health benefits of gardening and get some good tips and instruction too.
In short, this is a sweet, moist cinnamon-spiced snack bar that is healthy enough to be part of breakfast and yummy enough to be served as dessert especially with a little topping. Ice cream anyone? Just don’t get the family psyched up for their best ever Mom made brownies and you’ll get rave reviews on these.
This is a perfect use for those left-over white beans. I like to use navy or cannellini beans but any lighter colored bean will do. I did try chick peas but found it gave the bars a grainy texture I didn’t care for.
Early in the week I usually make a batch of at least one type of bean in my Instant Pot. No preplanning needed. I don’t season the beans. Nope, not even salt. I want the beans to be versatile later. I then have a supply for meals, salads and snacks like these bars or for edible cookie dough. You can also use canned beans. One 15 ounce can should do the trick.
So what makes these bars both healthy and yummy?
First the Health:
There is about a half a serving of beans in each bar and you will probably be tempted to eat more than just one.
The “flour” comes from rolled oats so it is gluten-free
It can be dairy-free by using coconut oil or you can use butter
It’s sweetened with maple syrup and brown sugar and the brown sugar can be switched up for coconut sugar or other natural alternative.
Now the yum:
A spiced sweetness without being overwhelming
A sweet frosting can be added for a more dessert like taste or just top with peanut butter and honey, or peanut butter and sweetened condensed coconut milk. People tell me they like the bars with no topping at all so to each his own.
Did I mention maple syrup? The maple, cinnamon, vanilla triad is unbeatable.
Now, a few tips:
It is UBER important to drain the beans. Yes, even homemade beans. I tried skipping this and the result was a stodgy texture. Think of a wet, heavy muffin that’s hard to swallow.
Add the oatmeal to the food processor or blender first and blend to course flour consistency. Everything else seems to blend better this way.
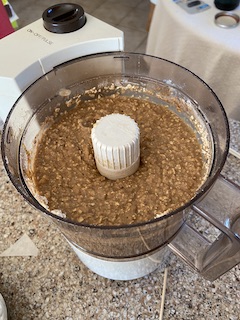
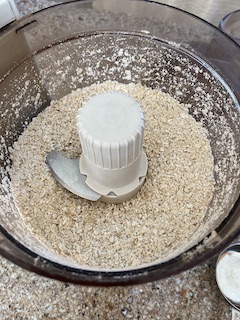
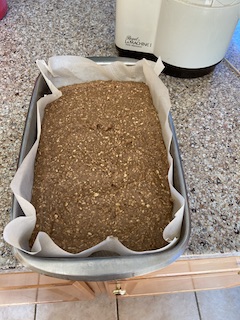
Yes, line the pan with parchment. This makes it really easy to lift the cooled bars out of the pan and slice.
Unless you plan to serve warm for dessert then wait until they are completely cooled to cut. This is true of all baked goods. The steam needs to lock in while cooling to produce a light bar and not “fall”. The bars are better stored in the refrigerator. They have a very light and delicate consistency at room temperature.
Now I know I said they could be part of breakfast. How you ask?
Serve the bar like a breakfast bar. This is a great option for busy mornings or fussy eaters. If you don’t tell them it’s a bean bar they won’t know. Serve with fruit and or carrot sticks and maybe some yogurt. I have also eaten a bar with a salad for lunch. Without the frosting each bar is about 104 calories and has 3.5 grams of protein, 30 grams of carbs and 2.3 grams of fat. If you cut only 6 bars instead of 9, there will be 156 calories per bar (no frosting) and 5.2 grams of protein, 44.7 grams of carbs and 3.4 grams of fat.
If, like me, you are partial to smoothies but would also like something to chew, these are a great accompaniment to a protein smoothie.
So here’s the recipe:
Have fun and let me know what you think. Please, please try serving them to your family without giving away the bean secret and tell me what the reception was like.
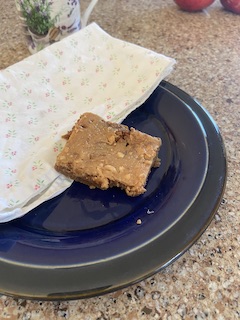
Bean Snack Bars
Equipment
- Blender or food processor
Ingredients
- 1 1/2 Cups cooked Navy or white kidney beans WELL DRAINED one 15 ounce can should work if you are not making your beans from scratch
- 1 Cup Rolled Oats
- 2 TBS Coconut Oil
- 1 TBS Vanilla
- 1/3 Cup Maple Syrup
- 1/3 Cup Brown Sugar or sub maple sugar or coconut sugar
- 1 1/2-2 tsp Cinnamon
- 1 1/2 tsp Baking Powder
- 1/2 tsp Baking Soda
- 1/2 tsp Salt
- 1/3 Cup Toasted Pecans or Walnuts Very optional. I usually omit
Peanut Butter Fosting (optional)
- 1 TBS Coconut Oil
- 1 TBS Peanut Butter
- 1 Cup Powdered Sugar
- 1/2 tsp Cinnamon
- dash milk adjust for consistency
Instructions
- Heat oven to 350F
- Line an 8X8 inch pan with parchment
- If using canned beans drain and rinse them. Skipping this step will result in stodgy (overly dense) bars.
- I like to add the oats to the food processor first and whirl into a course flour.
- Add all the bar ingredients except the nuts to the processor or blender and blend until smooth
- If using the nuts, sprinkle on top of the batter.
- Pour into the parchment lined pan and bake for about 30 minutes. Bake until the edges are cracked and a knife inserted into the center comes out clean.
- While you will be tempted to eat these right out of the oven, they are much better cooled. They retain their shape and moisture best that way. If you are serving as a dessert though feel free to top the warm bars with ice cream or whipped cream and enjoy.
- Store cut bars in the refridgerator.
For the Frosting
- Mix the frosing ingredients adding the liquid slowly to desired consistancy.
- Spead over bars while still slightly warm.

