Planning The Garden: where do I start?
It’s getting to be seed starting time! I’m so excited! We are moving in toward gardening season here in the north woods. People living in places with long growing seasons must wonder why we northerners get so excited about putting our hands into the dirt each year. Even when the ground is still blanketed with crusty, sparkling snow I begin dreaming of getting my hands into the soil and planting seeds. It might not be time to get out in the dirt, but it is time to be planning the garden: where do I start?
Maybe you ask this because you are new to gardening. Maybe you have been gardening for a while but always welcome new tips.
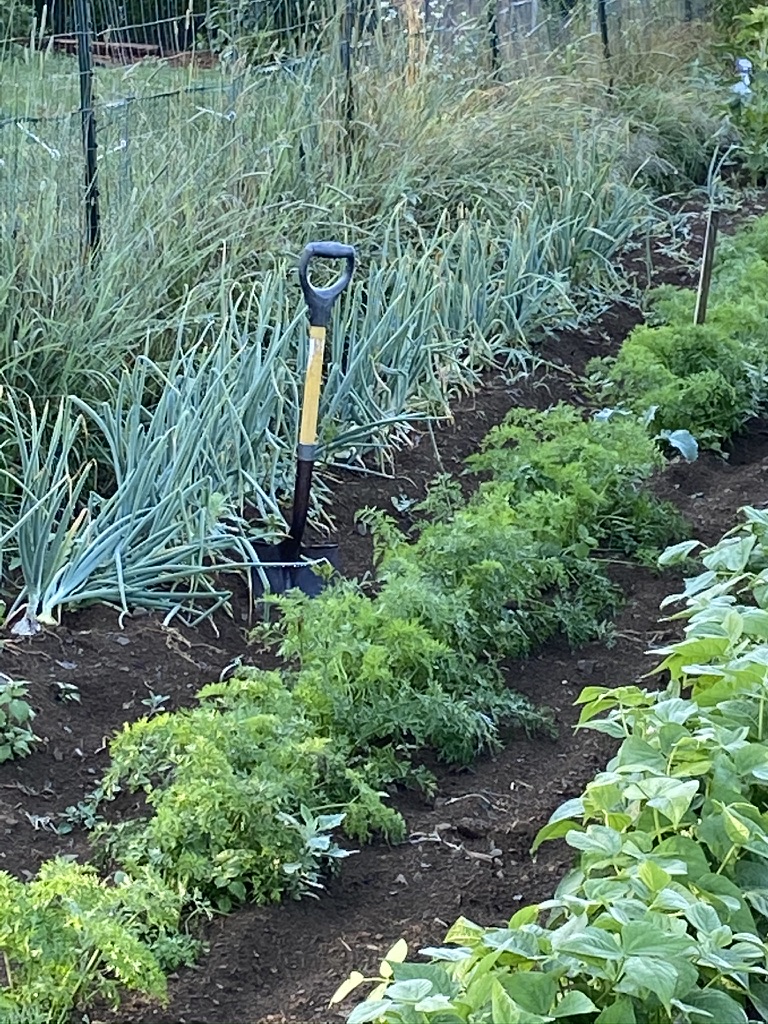
Onions, carrots and string beans grow in fertile soil.
Starting Seeds Indoors or Out
You can plant a lot of seeds right in the ground once the soil is warm enough to make those plants thrive. The soil should be about 65 degrees for most seeds to do well. Some plants, such as tomatoes and peppers, need a long season to grow and should be started indoors 4-6 weeks before moving them to your garden. So, mid-February is not the time to get started especially when we are looking at a last frost date at the very end of May or even early June. Some flowers need a much longer time inside so, if you are planning to grow those, please read the package instructions.
TAKE BACK YOUR VITALITY!
Learn more about the health benefits of gardening and get some good tips and instruction too.
So if you are thinking about planning the garden and wondering “where do I start?” read on.
By early April pepper seeds, leeks and eggplant can be started inside as well as some flowers like marigolds. I usually start onion seeds in mid April as well. Onion seeds are tiny and round. Onion sets look like a small bulb. Start seeds indoors and sets outside. Onions can take a lot of cold and can be planted before the last frost date.
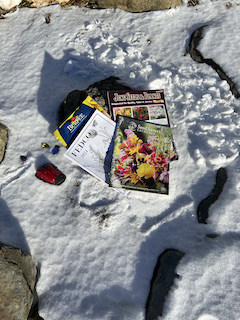
Before I dive into all the particulars about gardening and starting seeds indoors, let’s talk about garden planning. I already encouraged you to buy your seeds early and maybe you have them already. If not, really give buying seeds some priority because the good ones tend to sell out fast these days.
Planning the garden based on resources and goals:
First:
Be realistic about how much space you have to use and if that space gets plenty of sunshine. This is not to deter you. Once you take into account your land resource, you can plan your garden style. I have seen raised bed square foot gardening feed very large families. I have seen amazing container gardens. My preference is for a traditional garden. That is just a preference because I currently have acres of lawn and I would much rather weed than mow. As I age I might convert to raised beds. To be clear, when I say raised beds, I am talking about something that will not require stooping over. Some “raised beds” are little more than several inches high. These low rise raised beds still have advantages especially in areas where the top soil is shallow. They still require a lot of stooping over.

A variety of containers work for growing herbs
Second:
Be clear about your physical ability. Gardening provides lots of fresh air and exercise. You can easily adjust the amount of effort required to grow beautiful vegetables or flowers just by adjusting the size and type of garden.
When my mother was aging we all chipped in for a Veg-trudge Wall Hugger from Gardener’s Supply.
This is the link if you want to see what I am taking about. It is expensive but gave Mum a lot of pleasure. She grew tomatoes, cabbage, butternut squash and a host of other things in that planter. It would not be hard to make one either. pallets would make an inexpensive planter.
There are a multitude of container growing options. I have used kitty litter buckets to grow tomatoes, eggplant and basil on my deck. I have used old tires to grow potatoes. The tires work well because I can start the potatoes in one tire and then add more tires and soil or straw as the plants grow. Harvest becomes very easy by just moving the tires and a lot of potatoes grow in a small space. Here is a link to a video demonstrating the method. It works for white or sweet potatoes. https://www.youtube.com/watch?v=XUeul0TBFoo
My son and daughter-in-law have a nice little garden in an old tire from some heavy equipment. Some people have reported concerns about the chemicals from the tire leaching into the soil. I researched it and it does not look like a problem especially in a relatively cool and short growing season. Please do your own research.
Planning the Garden: Time is a Resource:
I get pretty excited about gardening, and love the challenge of growing as much of our food as I possibly can. I love the challenge of growing sweet potatoes or sweet red peppers in Maine.
This excitement extends to the size of my garden. I admit I have often bitten off more than I can chew, or weed, in a summer. Sometimes my garden has been full of weeds because I believed I could work full time and have a farm-sized garden. You know what? The garden might not have been pretty, and weeds added to my stress instead of my pleasure, BUT we still got a tremendous amount of vegetables in those weedy years. That being said, it’s best to be realistic about how much time you want to spend on your garden.
If you have big plans to spend most of the summer at the beach, you might want to have small garden plans.
Planning to use mulch: where do I start?
Speaking of time: using mulch between the rows will save HUGE amounts of time weeding and depending on your choice of mulch, can benefit your garden soil.
Before you plow up your yard and before you start hundreds of seeds or buy out the garden center. Plan out your garden and consider mulching between the rows.
Types of mulch:
- Straw: Note I did not say hay. You can use hay but it will need to be layered very thickly and hay will increase weeds but hay is cheaper than straw. I have used both
- Peat Moss: Works best between tomatoes because they love acidic soil. Will not work well with peas or beets because they love alkaline soil.
- Grass Clippings: Be sure they have thoroughly dried out before adding to the garden or they will mold and create blight in plants.
- Leaves: If you have a lot of leaves left from the fall these make great mulch. Be aware they will lower the pH making your soil more acidic so add lime with leaves.
- Shredded Newspaper: Not the glossy colored pages. Just the black and white pages or those with vegetable ink. I have used newspaper with good result but, living in a rural area means our newspapers are pretty small so I don’t have enough volume for the garden. I have used it shredded and just opened up and lying flat. Tends to blow away if not wet down.
- Mulching Fabric: Expensive on the investment side but good quality mulching fabric will last many years. Black fabric can help warm the soil and the fabric lets water through. It’s very easy to put down. Fabric will not improve your soil like the options above.
- Black Plastic: Works really well to keep weeds out. Adds a lot of warmth for crops like peppers and sweet potatoes. Down side is that rodents like to live under it. Rodents like to eat crops like sweet potatoes. Ask me how I know…
Planning The Garden: Where Do I Start?
Ok. So now you have given some thought to the size and style of your beautiful garden. You have considered weed management before it becomes an overwhelming problem. Now the real planning begins!.
The best way to do this is with paper and pens or colored pencils.
Mark off the size and shape of your garden and start mapping.
Remember, not everything gets planted at once. For instance, lettuce grows quickly and needs to be planted every couple of weeks to keep a steady supply. If you plant the whole packet of seeds all at once, you will be eating nothing but lettuce and then it will be gone. In fact, lettuce works well tucked in and around other plants especially cabbage, broccoli and cauliflower. The bigger plants give some shade to the lettuce and the lettuce helps keep down weeds between the other plants.
Allow for room to walk in your garden. If the plants are packed too tightly they will compete for resources and you won’t be able to move freely in the garden. I tend to have areas of concentrated plantings with paths around them.
How you arrange the garden will depend on lighting and artistic value. I like to put my taller crops near the middle of the square/rectangle and shorter plants around the perimeter. On the very border of the garden I plant sunflowers and climbing nasturtiums.
Helpful Tips for Planning
- Be creative: one of the benefits of gardening is the natural growing artwork involved.
- Consider combinations of garden types. It’s ok to add containers to your traditional garden.
- A small table and chairs make a lovely focal point and provide a place to relax and hydrate.
- Use vertical space where you can. I use metal posts for my tomatoes to climb up. (really they are tied to the post) Keeping them off the ground prevents rot and they take up a lot less space. Random lengths of chicken fencing are good for peas. Cucumbers and small squash will grow up pallets.
- Plant lettuce between your cabbage family.
- Always plant some flowers in the garden. It adds beauty and many flowers are edible or medicinal. Nasturtiums have a spicy flavor and perk up salads.
- Lightweight floating fabric row cover works well to keep pests off plants thus greatly reducing both damage and the need to use pesticides. (more about that below)
- Plan ahead for watering: I have very sandy/rocky soil. I use T posts with a short piece of pipe welded near the top of the post. The spike end of a sprinkler fits into the pipe. I have 3 stationed in my garden. Each has its own length of hose. I don’t need to enter the garden to water it and I can change which hose I hook up from outside the fence.
- Fence your garden in: Sad I know. Unless there are no deer, woodchucks, etc in your neck of the woods, you will need a fence or a good dog who sleeps outside.
Row cover as pest prevention
Lightweight floating row cover changed the way I garden. This is a white fabric that weighs about 0.5 ounces per square yard. As soon as seeds are planted in the garden (or young plants transplanted to the garden), spread the fabric right over the row. Leave slack so the plants have room to grow. Tuck the edges of the fabric securely in the soil and maybe even add a rock here and there so it won’t blow away. Yes, it is labor intensive.
The fabric has to be pulled back for weeding and then replaced. I started using this method last year and did not need any pesticides other than some BT after I removed the fabric from my Brassica family vegetables (cabbage, kale etc.) The fabric will need to be removed from plants that flower and fruit but it could be used all season on greens. I used it on my sweet corn and had no trouble with crows pulling up the young plants to snap the seed off the bottom.
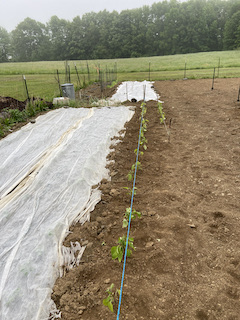
Floating row cover over emerging beans. The uncovered row on the right was affected by beetles while the beans under the cover were protected.
Happy Garden Planning
Hopefully you are planning your garden and not still wondering “Where do I start?” Really all you need is some goals for your garden and then get creative with mapping it out. If you are starting seeds indoors be sure to read the directions and don’t start too early. I know it’s tempting but you will get better results with planning.
Check out my free garden planner and journal pages for even more inspiration!
Also check out my post on 5 Ways to Preserve Food at Home to start planning for your harvest.
